Indicative Content 3.5: Smooth of curved object
Application of smoothing
1. Sandpaper
- Sandpaper is a simple way to keep a point on difficult-to-sharpen drawing pencils, charcoal, pastels, or crayons. 12 sheets of 1x4" fine sandpaper are padded and mounted on wood block.

2. Hand-Sand the Curves
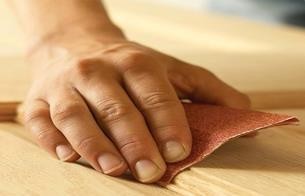
- Sand curved surfaces—and other areas an electric sander can't reach—by hand.
- Treat all areas equally, using the same progression of sandpaper grits for both hand and power sanding.
- Start with 80-grit to sand away blemishes, then use 120-grit and finally 180-grit.
- Using these exact grits isn't vital (100-150-180 works too), but it's important to progress in steps, removing deeper scratches and leaving finer scratches each time

3. Sand without Scratches
- A random orbital sander leaves practically invisible scratches, so you can sand across joints where the grain changes direction.
- But move slowly (about 1 inch per second) and apply light pressure. Otherwise, you'll get swirly scratches.

4. Sand With the Grain
- Sand with the grain when hand sanding or using a belt sander.
- Scratches are hard to see when they run parallel to the grain.
- But even the lightest scratches across the grain are obvious, especially after staining.

